Last week I taught one of my jewelry making classes. Everyone had a blast and loved the end-result! One of the reasons, besides the pride and joy of finishing a piece of wearable art, was the fact that the girls could design their own, pick their favorite charms and beads and incorporate these ideas.
So I decided to spread the joy even further 🤗 with this post and the kits I created that I will offer on my website.
Here you go ….
Necklace ~’Free Your Creative Spirit’
Materials:
1 Earring Loop
1 larger charm (to fit inside the loop)
various charms and beads (for dangles)
Head- and Eyepins
oval jumprings (number depends on the number of dangles you create; I made 5)
1 – 10mm jumpring
40″ cord (I use faux suede)
small link chain
3 – 14mm wood beads

1 } Look over your bead and charm selection, and decide on the design.
Thread the beads onto the pins; take a chain link and attach it to the charms.
Move it around until you are happy with the layout 😀 ~ and remember – nothing is permanent…you can always change it later (Now my mantra, by the way 😊 Many a times I’ve stood in my own way, getting stuck at this stage, afraid to get started )

2} Now, using your round-nose pliers, form wrapped loops – either connect it to the loop of another pin, or use a chain-link to connect the two.


3} If you’re happy with the individual length of the dangles skip this step…if not, read on
3.1) decide on your desired length and attach lengths of chain to your bead/charm

4} Design your focal with the earring hoop and a charm

…and attach the charm to the hoop.
5} Use one chain-link to connect the hoop to the 10mm Jumpring, fold the cord in half, thread the cord through the jumpring, and form a lark’s head knot.

6} Use the oval jumprings to attach the dangles to the loop

7} Now it’s time to finish up your necklace – the closure doo-hickey 😏
Get 1 wood bead and thread the ends of the cord through the hole – one from the right, one from the left

Thread a wood bead on either end, form an overhand knot – and you’re done. The length is now adjustable

…and you’re done!
Mine looks like this…
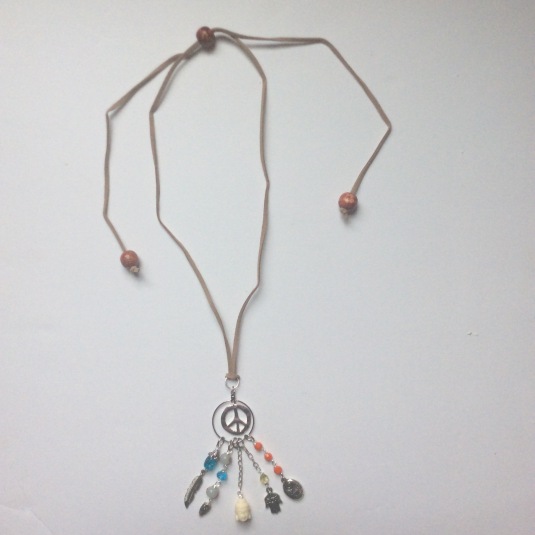
I’d love to see pictures of your finished piece!
I hope you had fun…Keep on beading!
Love & Light ☮
~Tina xoxo

Jun 26, 2016 @ 23:21:03
Wow neat!
LikeLiked by 1 person
Jun 26, 2016 @ 23:28:50
😃 Thank you, @The Smiling Pilgrim ~ I hope you enjoy making your own….can’t wait to see your finished beauty! 😍
LikeLike
Jun 26, 2016 @ 23:54:41
I was one of the lucky class members, and this was a blast!!!!! I hope you’ll all give it a try!
LikeLike
Jun 27, 2016 @ 00:58:47
Yay Gretchen! Thank you! 🙂
LikeLike